Add the content used by the dynamic object generator
In this step you add the content to the Kanzi Studio project that the dynamic object generator loads. In the last part of this step you export the .kzb binary of the Kanzi Studio project. When you complete the next step of this tutorial your application loads this .kzb binary when you launch your Kanzi application.
Create the prefab for the items in the trajectory list box
To create the prefab that holds the content for each item that the trajectory list box shows:
- In the Project > Prefabs create the prefab that holds the content for each item that the trajectory list box shows.
For example, create a Plane, name it Item. Under the Item create a Grid Layout, and under the Grid Layout create a Plane, and a Text Block.
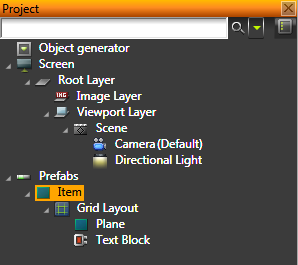
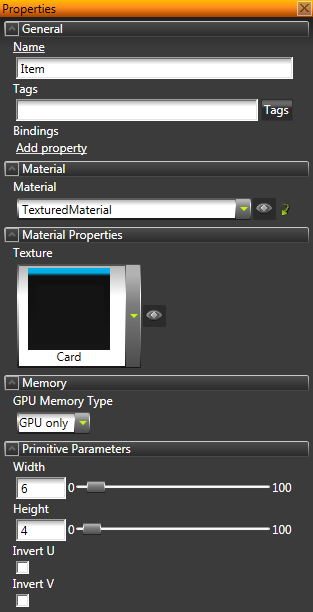
- In the Project > Prefabs select the Item and in the Properties add and set:
- Texture property to Card.png
- Width to 6
- In the Project > Prefabs > Item > Grid Layout select the Plane and in the Properties add and set:
- Texture to Contact.png
- Width and Height to 2
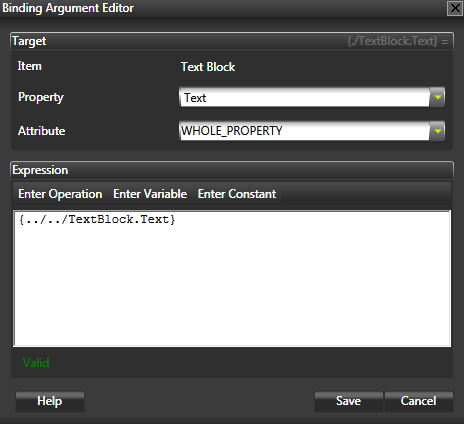
- In the Project > Prefabs > Item select the Text Block and in the Properties add and set the binding property to create a binding that binds the Text property to the
{../../TextBlock.Text}.
This binding enables you to control the text in each item shown in the trajectory list box through the C application.
- In the Project > Prefabs > Item select the Grid Layout and in the Properties add and set:
- Layout Direction to Down
With this setting you set the Plane in the Grid Layout to be shown above the Text Block. - Transformation property attribute Translation Z to 0,1
With this setting you bring the Grid Layout and its content in front of the Item plane.
Create and set up the trajectory list box
To create and set up the trajectory list box that into which the object generator loads the prefabs:
-
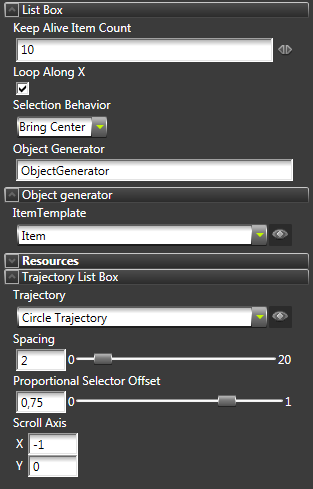
In the Project > Prefabs create a Trajectory List Box that defines the position of the list box in the scene and holds the items users can scroll, and in the Properties add these properties:
- ItemTemplate. Set the value to Item. Set the value of this property to the name of the prefab for the items that the trajectory list box shows. In C application for this tutorial you can set the name of the property in
OBJECT_GENERATOR_PREFAB_TEMPLATE_PROPERTY_TYPE.
- Object Generator. Set the value to ObjectGenerator. Set the value of this property to the same value you set for the
OBJECT_GENERATOR_FACTORY_STRING in the C application for this tutorial.
This property points to the object generator you create in the C application code, which reads the TrajectoryItems property to determine the number of available items for display in the trajectory list box. The list box asks the object generator for all the visible objects, while the rest of the objects in the list are not shown. When you scroll the list box, the visible objects change, and the list box asks for more objects. For each requested object, the object generator starts a background task to load the requested image, instantiates the image prefab, and gives the instantiated object to the list box for display.
- Keep Alive Item Count. Set the value to the number of items you want the trajectory list box to cache.
For example, cache 10 items.
- Spacing to 2
This property adjusts the spacing between the items in the trajectory list box.
- Selection Behavior to Bring Center
This property value tells the trajectory list box to bring the selected item in the trajectory list box to the center.
- Proportional Selector Offset to 0,75
This property value sets the position of the selected object in the trajectory list box.
- Scroll Axis attribute X to -1
The attributes of this property set the axis along which the items on the trajectory scroll.
- Drag the Trajectory List Box prefab to the Scene to instantiate it there.
- In the Library > Trajectories select the Circle Trajectory and in the Properties set the Radius property to 20.
Adjust the camera
To adjust the camera so that it shows the trajectory list box from inside the circle trajectory, in the Project select Screen > Root Layer > Viewport Layer > Scene > Camera and in the Properties set the Transformation property attributes. For example, use these attributes:
- Rotation X to -10
- Translation Y to 4
- Translation Z to 10.
Create the highlight animation
When you select an item in the trajectory list box, the application plays the highlight animation to show which item in the trajectory list box is currently selected.
You only need to create the animation to show that the item is selected. You use the same animation to show that an item in the trajectory list box is not selected anymore by playing the same animation in reverse. You trigger both animations from the C application.
To create the highlight animation:
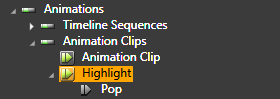
- In the Library right-click Animations, select Create > Animation Clip, then right-click the animation clip you created, and select Create > Animation.
For example, name the animation clip Highlight and the animation Pop.
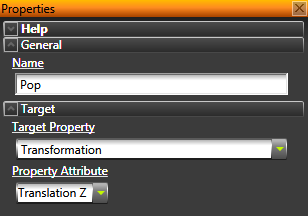
- In the Library select the animation Pop, and in the Properties set the Property Attribute to Translation Z.
This animation changes only the value of the Translation Z attribute of the Transformation property to create an animation that brings the selected item slightly forward.
- In the Library > Library tab double-click the Highlight animation.
The Animation Clip Editor opens.
- In the Animation Clip Editor select the Move tool
 and in the animation canvas click the animation Lift animation to select it.
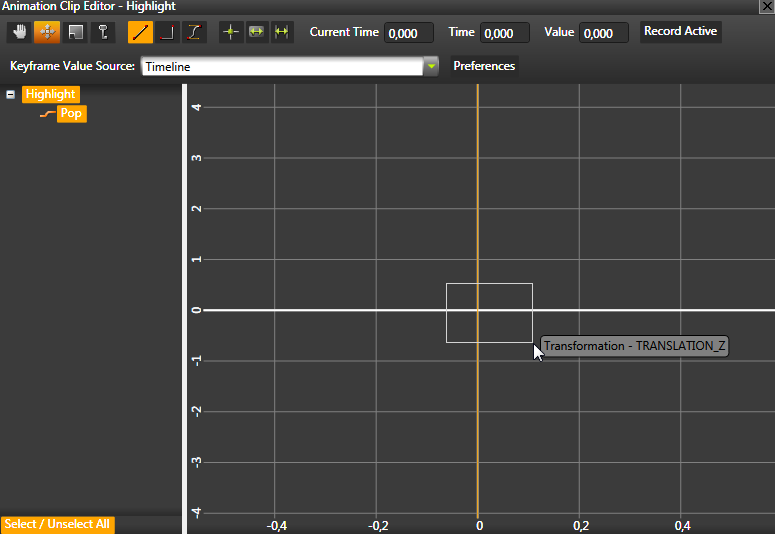
- Select the Keyframe tool
 and in the animation canvas create two keyframes by clicking the animation.
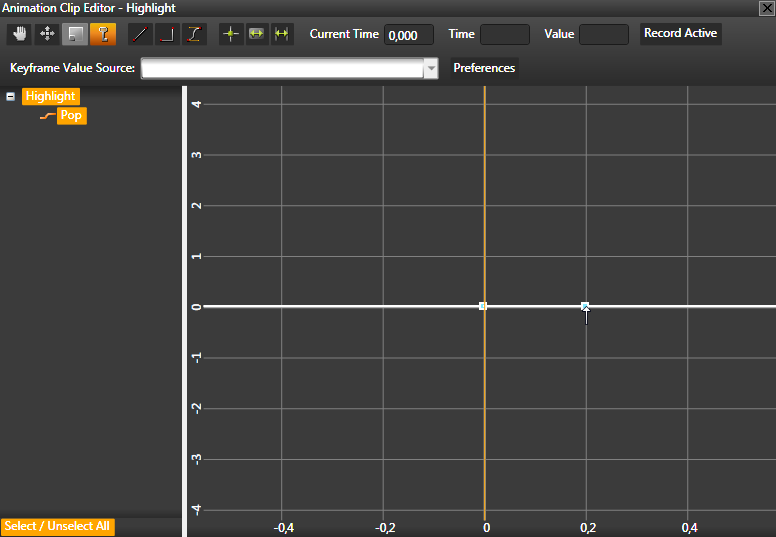
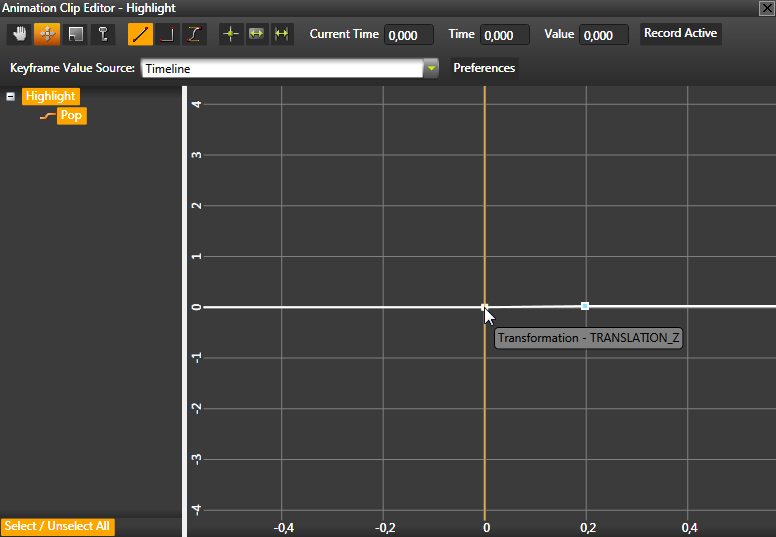
- Select the Move tool, select the first keyframe, and set:
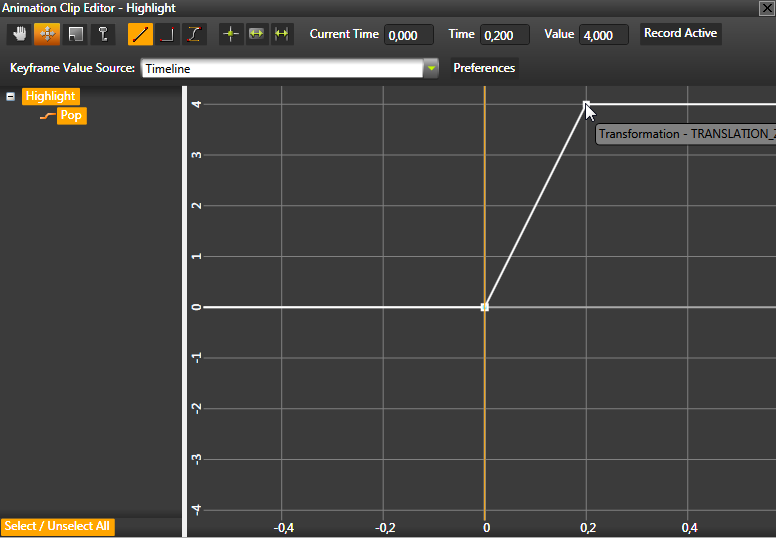
- Select the second keyframe and set:
Export the .kzb binary
When you complete the work in the Kanzi Studio project, export the .kzb binary of the project. The application you create in the next step of this tutorial loads this binary when you run the application.
In Kanzi Studio select > Export KZB Binary.
Kanzi Studio creates the binary and configuration files from your Kanzi Studio project and stores them in <KanziWorkspace>/Projects/<ProjectName>/Application/bin. When you run your Kanzi application from Visual Studio, your Visual Studio solution reads these files to create your Kanzi application.

< PREVIOUS STEP
NEXT STEP >
See also
Creating and editing prefabs
Using bindings
Using trajectory list boxes
Using line trajectories
Animating movement
Editing animation clips
Open topic with navigation